
SailPoint IdentityIQ Installation Guide: A Complete Step-by-Step Walkthrough
AI Overview Summary: Installing SailPoint IdentityIQ involves preparing a supported Java and application server environment, configuring a database, deploying the IdentityIQ WAR file, and running the initial setup wizard. A successful installation depends on meeting system prerequisites, correctly configuring the database schema, and validating the environment before moving to production.
★★★★★
4.9/5 rated by 1329+ students · Google Verified
Table of Contents
Introduction
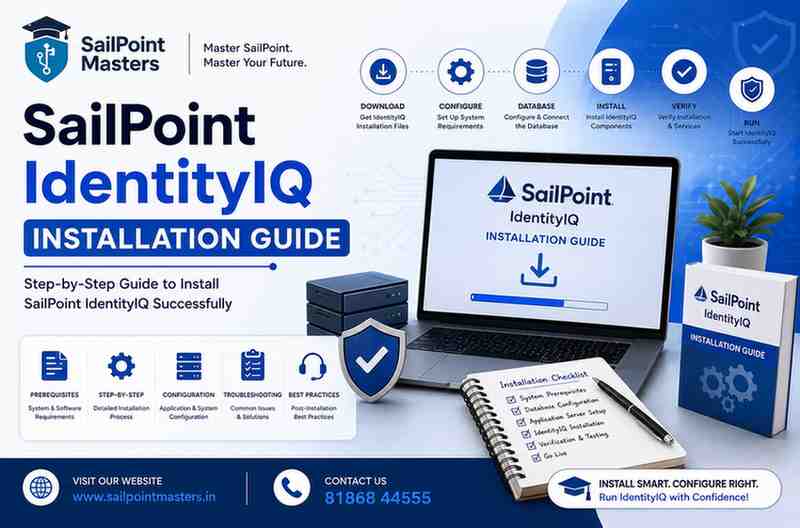
The SailPoint IdentityIQ Installation Guide provides a step-by-step approach to deploying, configuring, and preparing IdentityIQ for a secure and reliable enterprise identity governance environment.
SailPoint IdentityIQ (often shortened to IIQ) is one of the most widely deployed Identity Governance and Administration (IGA) platforms in the enterprise world, built and maintained by SailPoint. It helps organizations manage user access, automate provisioning, enforce compliance policies, and reduce the risk of unauthorized access to critical systems.
Getting the installation right matters. IdentityIQ sits at the center of an organization’s identity security program, so a misconfigured environment can lead to performance issues, failed compliance audits, or security gaps down the line. This SailPoint IdentityIQ installation guide walks through every stage of the process — from prerequisites to post-installation configuration — so both beginners and experienced IAM professionals can set up a stable, production-ready environment.
Whether you’re a new identity engineer building your first sandbox or a consultant preparing a client’s production deployment, this guide covers what you need to know.
SailPoint IdentityIQ Installation Guide
What is SailPoint IdentityIQ?
SailPoint IdentityIQ is an enterprise identity governance platform that centralizes how organizations manage digital identities, access certifications, role management, and provisioning workflows. It connects to HR systems, directories like Active Directory and LDAP, and countless business applications to give organizations a single view of who has access to what.
IdentityIQ is built on Java and typically runs on an application server such as Apache Tomcat, backed by a relational database like MySQL, Oracle, or Microsoft SQL Server. Because it’s a self-hosted (on-premises or IaaS-hosted) product, the installation process requires more hands-on configuration than a pure SaaS tool — which is exactly why a clear installation guide is valuable.
If you’re looking to build these skills in a structured, mentor-led setting, our SailPoint Certification Training in Hyderabad covers installation, configuration, and real-world administration in depth.
Why Install SailPoint IdentityIQ?
Organizations install IdentityIQ to solve a few recurring identity challenges
- Access certifications — automating periodic reviews of who has access to what
- Compliance — meeting regulatory obligations under frameworks like SOX, HIPAA, GDPR, and PCI-DSS
- Lifecycle management — streamlining employee onboarding, role transitions, and offboarding through automated workflows
- Role-based access control — modeling and enforcing least-privilege access
- Visibility — providing a unified inventory of identities and entitlements across the enterprise
A correctly installed IdentityIQ environment is the foundation all of these capabilities are built on. If the underlying installation is unstable, everything built on top of it — certifications, workflows, integrations — inherits that instability.
SailPoint IdentityIQ Installation Prerequisites
Before starting the SailPoint IdentityIQ setup, gather the following
- A supported Java Development Kit (JDK)
- A supported application server (Apache Tomcat is most common)
- A supported relational database (MySQL, Oracle, or SQL Server)
- The IdentityIQ installation media (WAR file and installer package) from SailPoint’s support portal or Compass community
- A valid IdentityIQ license file
- Network access between the application server and the database
- An account with administrative privileges on the target host
It’s worth confirming your specific IdentityIQ version’s compatibility matrix on the official SailPoint Documentation portal before proceeding, since supported Java, Tomcat, and database versions change between IdentityIQ releases.
System Requirements for SailPoint IdentityIQ
At a high level, IdentityIQ environments need adequate CPU, memory, and disk resources to handle identity data volume and concurrent user sessions. Larger identity populations, more connected applications, and heavier certification campaigns all increase resource needs. Development and sandbox environments can run comfortably on modest hardware, while production environments serving thousands of identities need more generous CPU, RAM, and storage allocations, along with a properly sized JVM heap.
Software and Hardware Requirements
|
Component |
Minimum Version |
Recommended Version |
Purpose |
|
Java JDK |
Version supported by your IIQ release |
Latest supported LTS release |
Runs the IdentityIQ application |
|
Apache Tomcat |
Version supported by your IIQ release |
Latest supported stable release |
Hosts the IdentityIQ web application |
|
Database |
MySQL / Oracle / SQL Server (version per compatibility matrix) |
Latest supported version |
Stores identity, configuration, and audit data |
|
RAM |
8 GB (dev/sandbox) |
16 GB+ (production) |
Application and JVM heap performance |
|
CPU |
2 vCPUs (dev/sandbox) |
4+ vCPUs (production) |
Handles concurrent processing |
|
Disk |
20 GB+ |
100 GB+ (production, with growth headroom) |
Application files, logs, and database growth |
Always cross-check the exact supported versions against SailPoint’s official compatibility matrix for your specific IdentityIQ release, since these details change from version to version.
Required Components Before Installation
Before you begin the SailPoint IdentityIQ installation, confirm the following components are ready
- Operating system patched and hardened per your organization’s standards
- JDK installed and JAVA_HOME configured
- Application server (Tomcat) installed but not yet running IdentityIQ
- Database server installed, with a dedicated database and service account created
- JDBC driver for your chosen database downloaded and available
- IdentityIQ installation files extracted to a working directory
- License file obtained from SailPoint
Downloading SailPoint IdentityIQ Installation Files
IdentityIQ installation files are distributed through SailPoint’s official customer support portal (Compass) rather than a public download page, since it’s licensed enterprise software. After logging in with valid credentials, you’ll download
- The IdentityIQ installer package (contains the WAR file, database scripts, and utilities)
- Relevant updates, maintenance releases, or security hotfixes available for your installed software version
- The JDBC driver appropriate to your database platform (this is usually sourced separately from your database vendor due to licensing)
Always verify checksums where provided, and keep installation media organized by version for future upgrades or reinstallation.
Database Configuration for SailPoint IdentityIQ
IdentityIQ stores its configuration, identity cubes, and audit data in a relational database. Setting this up correctly is one of the most important steps in the installation process.
General steps include
- Create a dedicated database/schema for IdentityIQ (don’t share it with unrelated applications)
- Create a database user with appropriate privileges scoped to that schema
- Set the correct character set and collation (UTF-8 is standard for identity data with international characters)
- Run the database creation scripts provided in the IdentityIQ installer to create tables, indexes, and stored procedures
- Configure connection pooling settings appropriate to expected load
Getting character encoding and collation right at this stage avoids painful data corruption issues later, especially in multinational deployments.
Application Server Configuration
Apache Tomcat is the most common application server for IdentityIQ deployments. Configuration typically involves
- Setting appropriate JVM heap size (-Xms and -Xmx) based on expected identity volume
- Configuring Tomcat connectors and thread pools for expected concurrent user load
- Setting the correct timezone and locale
- Placing the JDBC driver JAR in Tomcat’s library path
- Configuring SSL/TLS for production environments, ideally terminating HTTPS at the load balancer or a reverse proxy in front of Tomcat
Installing Java, Apache Tomcat, and Required Software
- Install the JDK — download and install a supported JDK version from Oracle Java, then set the JAVA_HOME environment variable and confirm with java -version.
- Install Apache Tomcat — extract the Apache Tomcat distribution, set CATALINA_HOME, and adjust server.xml for your desired ports and connectors.
- Install the database server — install and harden MySQL or Microsoft SQL Server according to vendor guidance, then create the IdentityIQ database and user.
- Place the JDBC driver — copy the appropriate JDBC driver JAR into Tomcat’s lib directory so IdentityIQ can connect to the database.
Step-by-Step SailPoint IdentityIQ Installation Guide
1. Environment Preparation
Confirm the OS, Java, Tomcat, and database are installed and meet the compatibility matrix for your IdentityIQ version. Create service accounts and confirm network connectivity between the app server and database.
2. Java Installation
Install and verify the JDK. Confirm JAVA_HOME is correctly set for the account running Tomcat.
3. Database Creation
Create the IdentityIQ database/schema and a dedicated database user with the necessary privileges.
4. Database Schema Configuration
Run the IdentityIQ-provided SQL scripts to build the schema — tables for identities, roles, policies, certifications, and audit logs.
5. IdentityIQ WAR Deployment
Copy the identityiq.war file into Tomcat’s webapps directory, or extract it manually into a folder under webapps for more control over configuration files before first startup.
6. Tomcat Configuration
Adjust JVM options, context paths, and connector settings so Tomcat can serve the deployed application efficiently.
7. Application Properties Configuration
Edit the IdentityIQ configuration files (such as iiq.properties and the Hibernate/database configuration files) to point to your database connection details, credentials, and environment-specific settings.
8. IdentityIQ Initialization
Start Tomcat and navigate to the IdentityIQ configuration/setup page in a browser. This page walks through validating database connectivity and initializing the schema if it hasn’t been pre-loaded.
9. First-Time Login
Once initialization completes, log in to the IdentityIQ user interface for the first time using the default administrator credentials provided in the documentation.
10. Administrator Account Setup
Immediately change the default administrator password and create named administrative accounts for each individual who needs elevated access — avoid shared admin logins.
11. License Installation
Upload your SailPoint-issued license file through the system configuration screens so the application unlocks its full licensed feature set.
12. Initial Configuration
Configure system settings such as mail server details, time zone, password policies, and initial application sources (Active Directory, LDAP, HR systems) as needed for your environment.
SailPoint IdentityIQ Post-Installation Configuration
After the base installation is running, typical post-installation tasks include
- Connecting source applications (Active Directory, LDAP, databases, flat files, or SaaS apps)
- Configuring identity correlation rules and aggregation schedules
- Setting up workflows for provisioning and certifications
- Establishing role models and access policies
- Configuring email notifications for approvals and certifications
- Setting up backup and disaster recovery procedures for the database and application files
Common Installation Errors and Troubleshooting
|
Error |
Possible Cause |
Resolution |
|
Database connection failure |
Incorrect JDBC URL, credentials, or firewall blocking the port |
Verify connection string, credentials, and network/firewall rules |
|
Java version incompatibility |
Unsupported or mismatched JDK version |
Install the JDK version listed in the compatibility matrix for your IIQ release |
|
Tomcat fails to start |
Port conflicts or misconfigured server.xml |
Check logs, confirm ports are free, review connector configuration |
|
Bean initialization errors |
Corrupted or incomplete WAR deployment |
Redeploy the WAR file cleanly and check Spring/Hibernate configuration files |
|
License errors |
Missing, expired, or invalid license file |
Re-upload a valid, current license file from SailPoint |
|
Memory/heap errors |
Insufficient JVM heap allocation |
Increase -Xms/-Xmx values based on expected load |
|
SSL configuration issues |
Misconfigured certificates or keystore |
Verify keystore path, password, and certificate chain |
When troubleshooting, always start with the IdentityIQ and Tomcat log files — they usually point directly to the root cause, whether it’s a stack trace from a failed database connection or a Spring bean that failed to initialize.
Best Practices for SailPoint IdentityIQ Installation
New to IAM concepts? Our SailPoint course for beginners breaks down these fundamentals before diving into hands-on installation work.
- Always test in a development or sandbox environment before touching production
- Keep installation media and patches organized by version
- Document every configuration change for future upgrades
- Automate repeatable steps (schema scripts, configuration templates) where possible
- Maintain a rollback plan before major changes
Security Recommendations After Installation
- Change all default credentials immediately after installation
- Enforce SSL/TLS for all IdentityIQ traffic
- Restrict database access to only the application server
- Apply the principle of least privilege to service and admin accounts
- Enable and regularly review audit logging
- Keep the platform patched according to SailPoint’s security advisories
Performance Optimization Tips
- Right-size the JVM heap based on identity volume and concurrent usage
- Tune database connection pool sizes to match expected load
- Schedule resource-intensive aggregation and certification jobs during off-peak hours
- Monitor garbage collection behavior and adjust JVM settings if pauses become an issue
- Use a load balancer and multiple application nodes for high-availability production deployments
SailPoint IdentityIQ Installation Checklist
- Confirm compatibility matrix for JDK, Tomcat, and database
- Install and verify JDK
- Install and configure Tomcat
- Install database server and create dedicated schema/user
- Place JDBC driver in Tomcat’s library path
- Deploy IdentityIQ WAR file
- Configure application properties and database connection
- Run initialization/setup wizard
- Change default admin credentials
- Upload license file
- Configure mail server and system settings
- Connect initial source applications
- Validate in a non-production environment before go-live
Explaining the Key Technologies
SailPoint IdentityIQ Architecture is built on Java and follows a layered design, with a web application tier, a business logic layer, and a persistence layer backed by a relational database.
Apache Tomcat is the servlet container most commonly used to host the IdentityIQ web application.
Java JDK provides the runtime environment IdentityIQ needs to execute; version compatibility is critical.
MySQL, Oracle, and Microsoft SQL Server are the supported relational databases that store IdentityIQ’s identity, configuration, and audit data.
The IdentityIQ WAR File packages the compiled application for deployment into Tomcat.
JDBC Driver is the library that allows IdentityIQ’s Java code to communicate with your chosen database.
BeanShell is a scripting engine IdentityIQ uses for custom rules and logic within workflows and certifications.
IdentityIQ Console is a command-line interface for administrators to run diagnostic commands and scripts against the environment.
SailPoint Debug Pages are internal diagnostic pages used to inspect objects and troubleshoot configuration issues (access should be tightly restricted in production).
Log4j Logging is the logging framework IdentityIQ uses; log files are the first place to look when troubleshooting.
SSL Configuration secures traffic between users, the application server, and downstream systems.
Active Directory Integration and LDAP Configuration let IdentityIQ read and manage identities from directory services.
Email Server Configuration enables IdentityIQ to send notifications for approvals, certifications, and password resets.
If you’re deciding where to focus your learning, this comparison of SailPoint IIQ and IdentityNow — which module should you learn? and this breakdown of differences between IdentityIQ and IdentityNow workflows can help clarify the two platforms.
Installation Workflow Overview
|
Stage |
Key Activities |
|
Environment Setup |
Install OS, JDK, Tomcat, database |
|
Database Configuration |
Create schema, user, run schema scripts |
|
Application Deployment |
Deploy WAR file, configure properties |
|
Initial Configuration |
Run setup wizard, set admin credentials, upload license |
|
Validation |
Test connectivity, source integration, workflows |
|
Production Readiness |
Apply security hardening, performance tuning, and monitoring |
Development, Testing, and Production Environments Compared
|
Environment |
Purpose |
Typical Sizing |
|
Development |
Building and testing configuration changes |
Minimal resources, single node |
|
Testing/QA |
Validating changes before production release |
Moderate resources, mirrors production configuration |
|
Production |
Live operational environment |
Full resource allocation, high availability, monitoring, and backups |
Industry Insights: Why IdentityIQ Skills Matter
Identity governance continues to be a top enterprise security priority. Zero Trust initiatives, growing regulatory pressure (SOX, HIPAA, GDPR, PCI-DSS), and the shift to hybrid and cloud identity environments have all increased demand for platforms like SailPoint IdentityIQ — and for professionals who know how to install, configure, and support it.
This growing demand is reflected in compensation too — see our breakdown of SailPoint course salary in Hyderabad for current numbers. And if you’re wondering what to do once you’ve built these skills, we cover that in after SailPoint certification, what next?
Why Learning SailPoint IdentityIQ Installation is Important for IAM Professionals
- Career benefits — hands-on installation experience differentiates candidates in a competitive IAM job market
- Enterprise demand — organizations across finance, healthcare, and government continue to invest in IGA platforms
- Real-world implementation skills — installation knowledge is foundational to configuration, troubleshooting, and upgrades
- Consulting opportunities — IAM consultancies value professionals who can stand up environments independently
- Certification preparation — installation experience reinforces concepts tested in SailPoint certification exams
- Production support knowledge — understanding the install process makes diagnosing production issues far easier
If you want a structured path into this skill set, check out our detailed SailPoint course syllabus and SailPoint roadmap, both of which cover installation and environment setup as core modules. Already working full-time? Our SailPoint course for working professionals is designed around flexible, weekend-friendly batches.
Key Takeaways
- A successful SailPoint IdentityIQ installation starts with verifying JDK, Tomcat, and database compatibility for your specific release
- Database schema setup and character encoding decisions early on prevent major headaches later
- The WAR deployment and application properties configuration steps are where most installation errors originate
- Post-installation security hardening (credentials, SSL, least privilege) should never be skipped
- Testing thoroughly in development and QA environments before production go-live protects against costly outages
Conclusion
Installing SailPoint IdentityIQ is a multi-step process that touches Java configuration, database setup, application deployment, and post-installation hardening. Getting each stage right — from verifying prerequisites to securing the environment after go-live — sets the foundation for a stable, scalable identity governance program.
Whether you’re building a personal lab to learn IAM skills or standing up a production environment for an enterprise client, following a structured SailPoint IdentityIQ installation guide like this one reduces risk and saves time. As identity governance continues to grow in importance across industries, investing time in mastering IdentityIQ installation is a valuable step for any IAM professional’s career.
If you’d rather learn this hands-on with expert guidance instead of piecing it together solo, our SailPoint Certification Training in Hyderabad walks you through installation, configuration, and real enterprise scenarios as part of the full course — with mentorship, live projects, and placement support included.
FAQ
- How do I install SailPoint IdentityIQ?
Install a supported JDK and Tomcat, set up a database, deploy the IdentityIQ WAR file, and run the initialization wizard to complete configuration.
- What are the prerequisites for IdentityIQ installation?
A supported JDK, application server, database, the IdentityIQ installation files, and a valid license file.
- Which Java version supports IdentityIQ?
Supported Java versions vary by IdentityIQ release — always check the compatibility matrix for your specific version on SailPoint’s documentation portal.
- Which database is recommended for IdentityIQ?
IdentityIQ supports MySQL, Oracle, and Microsoft SQL Server; the right choice depends on your organization’s existing database standards and licensing.
- How long does IdentityIQ installation take?
A basic sandbox installation can often be completed in a few hours, while a fully configured production environment with source integrations takes considerably longer.
- Can IdentityIQ run on Windows?
Yes, IdentityIQ can run on Windows as well as Linux, provided the required Java, Tomcat, and database versions are supported on that platform.
- How do I deploy the IdentityIQ WAR file?
Copy or extract the identityiq.war file into Tomcat’s webapps directory and configure the application properties before starting Tomcat.
- What is the default admin login?
IdentityIQ ships with default administrator credentials documented in SailPoint’s official installation guide — these should be changed immediately after first login.
- How do I troubleshoot IdentityIQ startup errors?
Check the Tomcat and IdentityIQ log files first; most startup issues trace back to database connectivity, Java version mismatches, or configuration file errors.
- Is SailPoint IdentityIQ difficult to install?
It requires familiarity with Java application servers and databases, but following a structured, step-by-step process makes the installation manageable even for newer IAM professionals.
Note
For deeper interview preparation once you’re comfortable with installation and configuration, see our SailPoint interview questions and answers, and if you’re weighing IAM as a career path, this piece on is SailPoint good for cybersecurity careers? is worth a read.
Conclusion
Installing SailPoint IdentityIQ is a multi-step process that touches Java configuration, database setup, application deployment, and post-installation hardening. Getting each stage right — from verifying prerequisites to securing the environment after go-live — sets the foundation for a stable, scalable identity governance program.
Whether you’re building a personal lab to learn IAM skills or standing up a production environment for an enterprise client, following a structured SailPoint IdentityIQ installation guide like this one reduces risk and saves time. As identity governance continues to grow in importance across industries, investing time in mastering IdentityIQ installation is a valuable step for any IAM professional’s career.
If you’d rather learn this hands-on with expert guidance instead of piecing it together solo, our SailPoint Certification Training in Hyderabad walks you through installation, configuration, and real enterprise scenarios as part of the full course — with mentorship, live projects, and placement support included.
SailPoint Trainer
SailPoint Masters Editorial Team | 15+ Articles Published
We specialize in SailPoint Certification Training in Hyderabad, helping aspiring professionals and IT experts develop in-demand Identity and Access Management (IAM) skills. Our training covers SailPoint IdentityIQ, Identity Security Cloud, certification preparation, real-world projects, and career guidance to support success in cybersecurity and identity governance careers.
Share